Mastering Lighthouse 3D SVG Multilayer Laser Files for Precision Wall Art
Creating dimensional wall art has evolved from a niche hobby into a sophisticated craft that blends digital design with tactile materials. At the heart of this trend is the Lighthouse 3D SVG Multilayer Laser Files collection, specifically the "Mundala" design. This intricate project offers a gateway to producing stunning home decor, but it also presents unique challenges for both beginners and seasoned makers. While the promise of a beautiful, shadow-casting lighthouse is enticing, the path to a flawless final product is paved with technical details that are often overlooked.
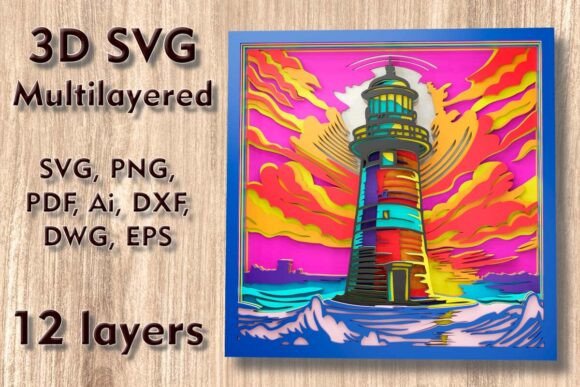
The appeal of this specific design lies in its versatility and depth. Comprising 12 separate layers, the file allows for a rich interplay of light and shadow, mimicking the rotating beam of a real lighthouse. However, many creators jump into cutting without fully understanding how material choice and machine calibration interact with such a complex, multi-tiered structure. Understanding the nuances of these files before you hit "cut" can save you hours of frustration and wasted materials.
Understanding the Scale and Structural Integrity
One of the most common misconceptions regarding multilayer laser files is the assumption that they are infinitely scalable without consequence. The standard size for this Lighthouse design is 270 x 270 mm (10.6 x 10.6 inches). This dimension is carefully calculated to ensure structural stability across all twelve layers. While increasing the size is generally safe and can even enhance the visual impact for larger wall spaces, reducing the design requires extreme caution.
When you shrink a vector design, you are not just reducing the overall footprint; you are proportionally reducing the thickness of every line and bridge within the artwork. In a 12-layer design, certain elements—such as the railing details on the lighthouse balcony or the intricate patterns in the base—are already quite delicate. If you reduce the overall size significantly, these thin elements may become too fragile to survive the cutting process or the assembly phase. They might break during weeding, fail to adhere properly, or simply look cluttered rather than detailed.
Practical Advice: If you need a smaller version, test cut a single critical layer first. Check if the smallest details hold together. If they do not, consider simplifying the design by removing the finest details in your vector software before cutting, or stick to the recommended minimum size to preserve the integrity of the artwork.
Material Selection: Beyond Basic Plywood
The file specifications list a wide array of compatible materials: Plywood, Paper, Cardstock, MDF, Wood, Acrylic, Cardboard, and Aluminum. This variety is a strength, but it can also lead to decision paralysis or poor material pairing. A frequent mistake is assuming that any plywood will yield the same result. For a 12-layer piece, consistency in thickness is paramount.
If you are using wood or MDF, ensure that each sheet is precisely the same thickness. Variations in ply thickness can cause alignment issues when stacking the layers, resulting in a lopsided final product. For paper and cardstock projects, the choice of weight matters. Lighter cardstock may warp under the heat of a laser or fail to provide enough rigidity for the upper layers to stand out. Conversely, heavy cardboard might be too bulky for the fine details of the lighthouse windows.
For those experimenting with Acrylic, remember that this material behaves differently than wood. It melts rather than burns, which can lead to fused layers if the power settings are too high. Additionally, acrylic does not have the natural grain that helps hide minor imperfections in wood, so precision in cutting is even more critical.
Navigating File Formats and Machine Compatibility
Upon purchase, you receive a ZIP folder containing SVG, layered SVG, DXF, DWG, EPS, AI, PNG, and PDF formats. Beginners often make the error of opening the wrong file type for their specific workflow. For instance, using a flattened PNG for a laser cutter will result in a single-layer silhouette, completely losing the 3D effect. Similarly, opening a layered SVG in software that does not support layer preservation can merge all twelve tiers into one uncuttable mass.
Cricut and Silhouette users should prioritize the layered SVG files. These formats retain the separation of each tier, allowing you to assign different cut lines or colors to each layer easily. This is essential for organizing your cut order and ensuring that you do not mix up the sequence during assembly. Laser cutter users, particularly those with Glowforge or CNC routers, will find the DXF and AI files most useful for importing into CAD or vector editing software where precise toolpath generation is required.
A subtle but important detail is the handling of overlapping paths. In some vector programs, overlapping lines can cause the laser to cut the same area twice, leading to charring or weakened structures. Always inspect your file in the preview mode of your software to ensure that lines are joined correctly and that there are no duplicate vectors hidden beneath others.
Assembly Techniques for Professional Results
The final hurdle is assembly. With twelve layers, the potential for misalignment is high. A common oversight is relying solely on visual alignment without using registration marks or jigs. For wood and MDF projects, using small dowels or pins through pre-drilled holes (if included in the design or added manually) can ensure perfect stacking. For paper and cardstock, double-sided foam tape is superior to liquid glue, as it adds height between layers, enhancing the 3D effect and preventing warping from moisture.
Another mistake is rushing the drying process. If you use liquid adhesives, allow ample time for each layer to set before adding the next. Rushing can cause the layers to slide, ruining the symmetry of the lighthouse. Take your time to clean up any char marks on wood layers with fine sandpaper before assembly, as these are much harder to remove once the pieces are glued together.
Maximizing Value for Small Business Owners and Hobbyists
For entrepreneurs and small business owners, this Lighthouse 3D SVG Multilayer Laser Cutting Files package represents more than just a single project. It is a template for understanding complex layering techniques that can be applied to other designs. By mastering the balance of scale, material, and assembly here, you build the skills necessary to tackle even more intricate commissions.
Consider offering customization options to your clients. Since the design is scalable, you can offer different sizes for different price points. You can also experiment with mixed media—using a wooden base with paper inserts for the light beams to create a translucent effect when backlit. This level of creativity transforms a standard cut file into a unique, high-value product.
In conclusion, the key to success with this lighthouse design is patience and attention to detail. Respect the limitations of the materials, choose the correct file format for your machine, and approach assembly with a methodical mindset. By avoiding common pitfalls and focusing on precision, you can create a piece of decor that truly captures the enchanting spirit of the coast.